Forum Replies Created
-
AuthorPosts
-
Richard S
ParticipantI found the best method was to tease one end of the transfer off with some pinpoint sharp tweezers and hold it down while pulling the paper out from underneath along its length, hopefully getting it roughly in the right place! Once it’s in roughly the right place I found you can lift the end of the transfer up and re-lay it in a better position if needed before teasing it in to position with the point of the tweezers by pushing it up against the masking tape. To get it ultimately as straight as line as possible I found pulling the transfer with the point of the tweezers along the length of the transfer working my way along about 5mm at a time drags it straight.
As soon as I was happy with it I removed the masking tape before it had a chance to stick to the transfer (I was getting paranoid by this point)
 Participant
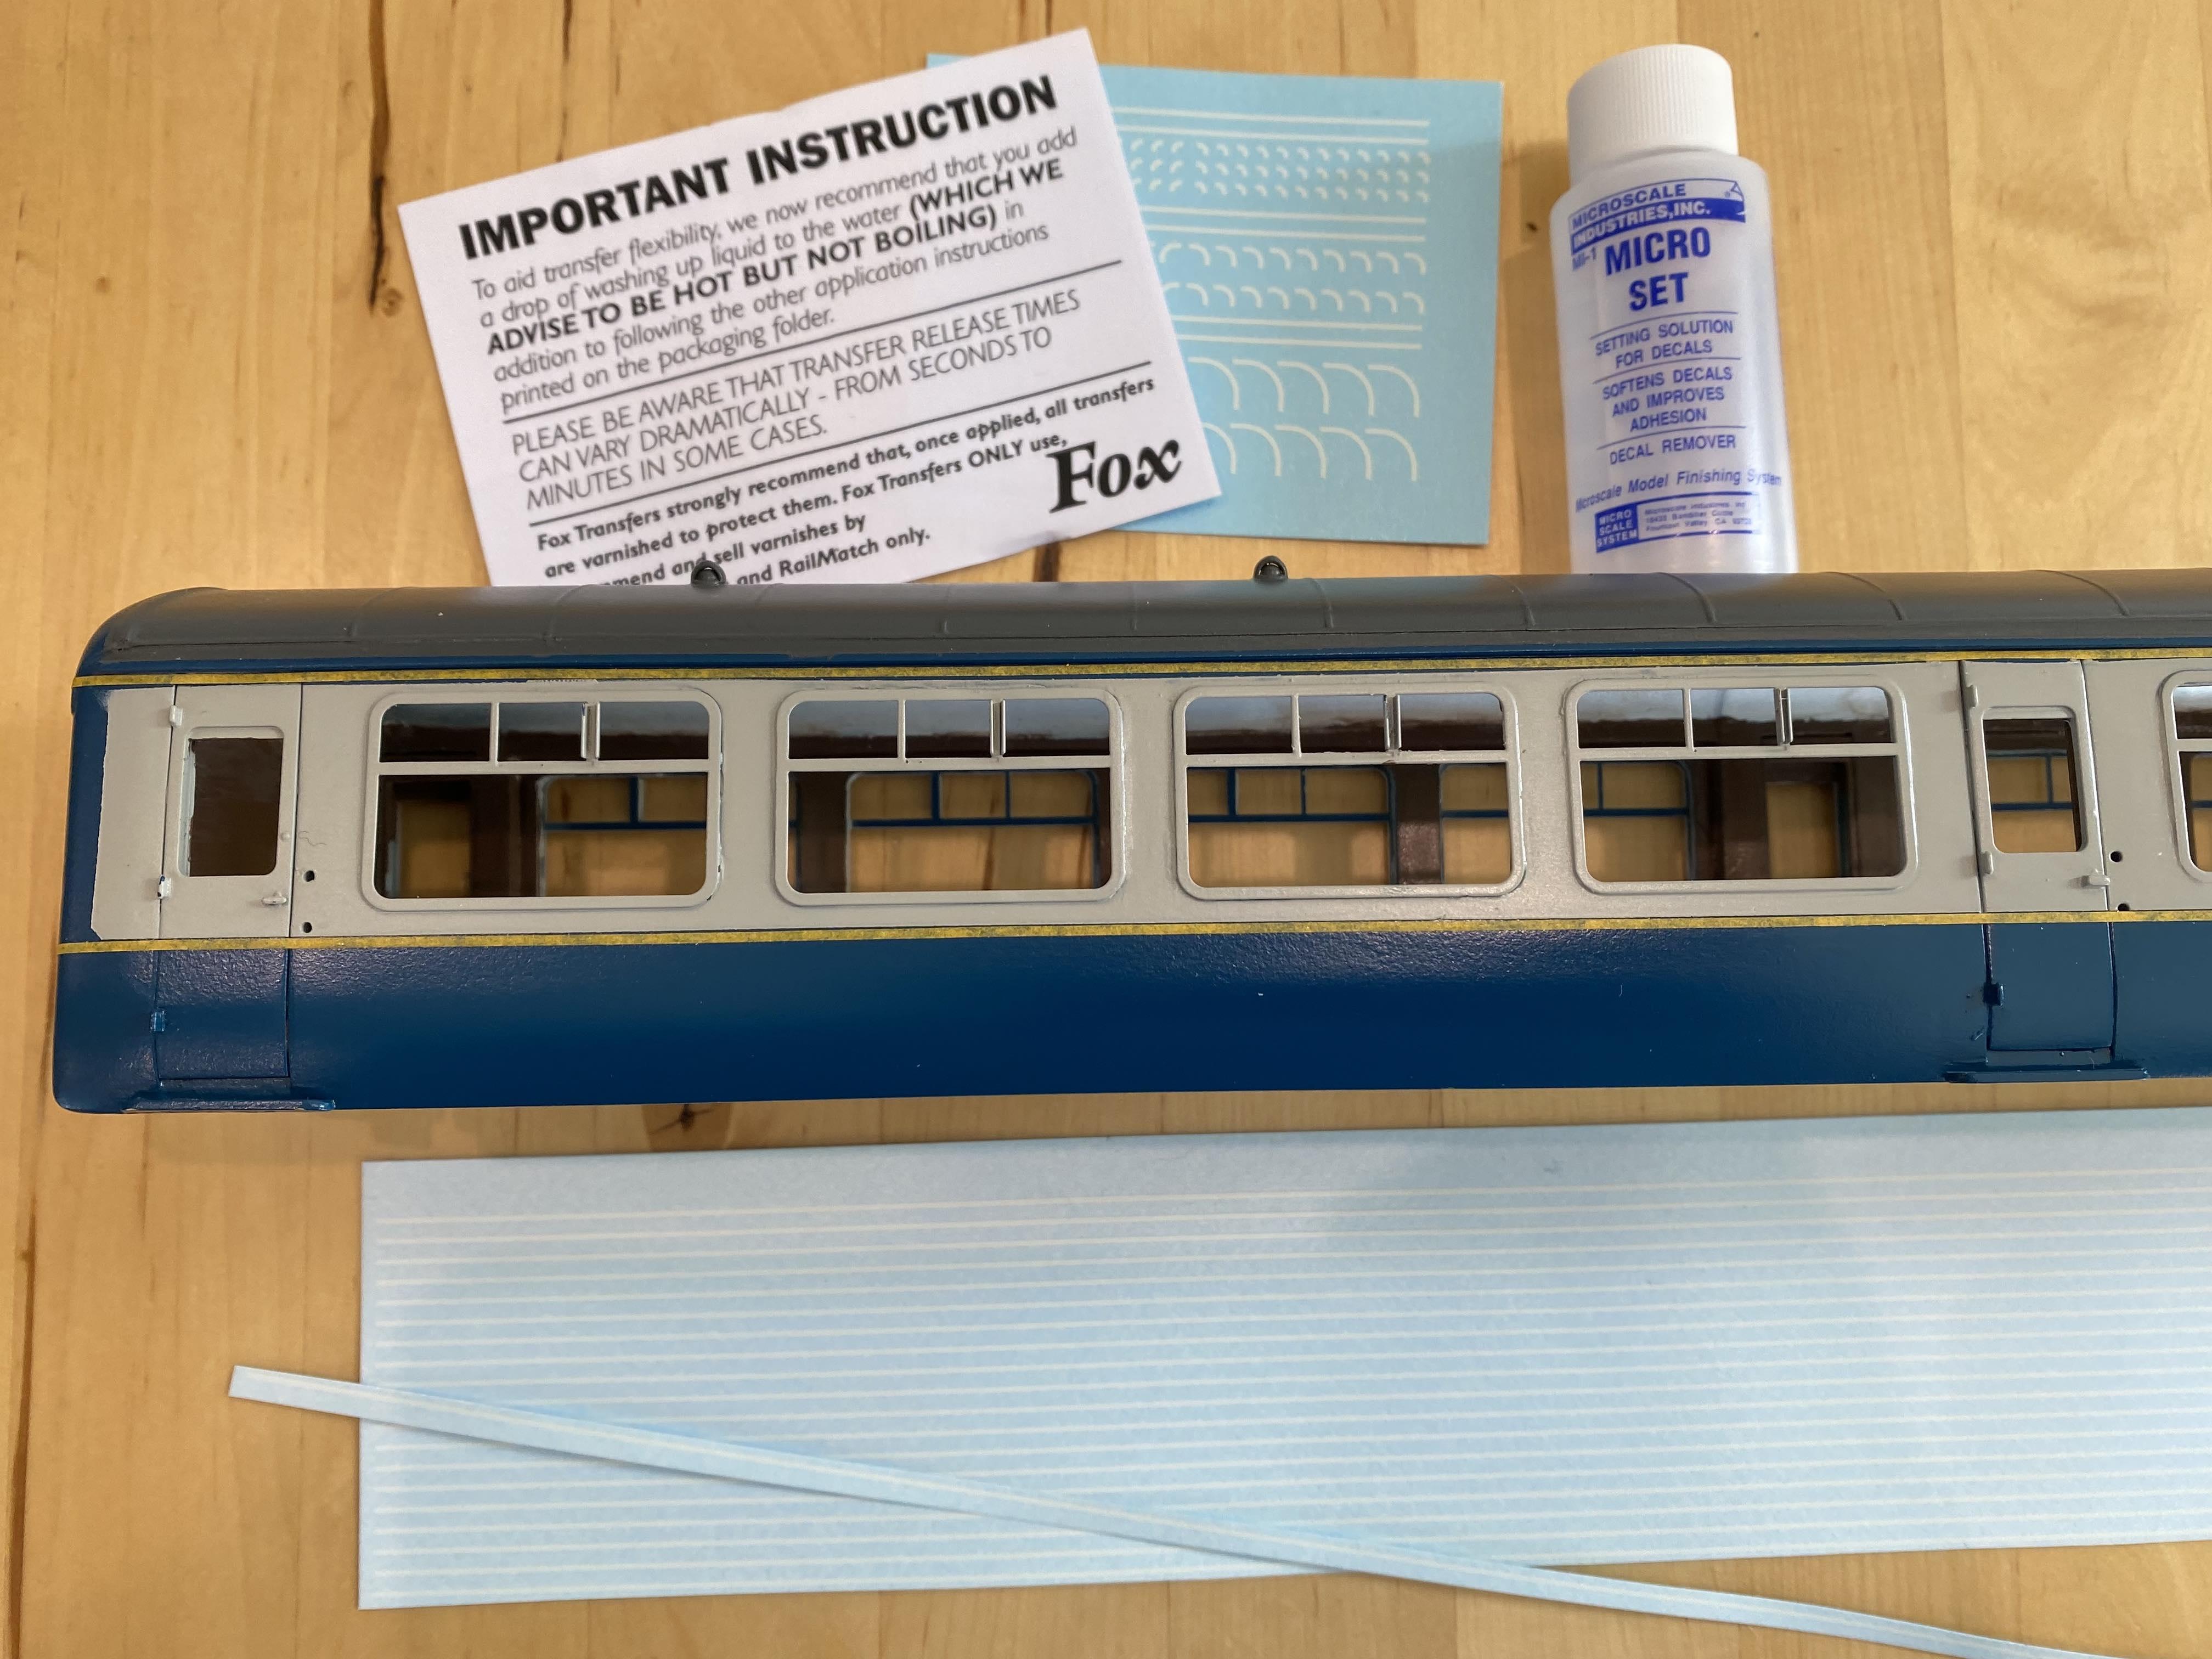
Here’s a picture I took as I was just starting to mask up for putting the white line transfers on around the grey window section.
The lines from Fox’s as water slide transfers as a set of lines and corners (I used the smallest corners in the set. Once cut out with a scalpel you soak the transfer in warm water with a drop of washing up liquid for about 30 seconds before applying. The bottle of Micro Set is to both help the transfer to slide a bit and once set helps to stick better.
The plan was to have a straight line of masking tape to use as a reference line.
 Participant
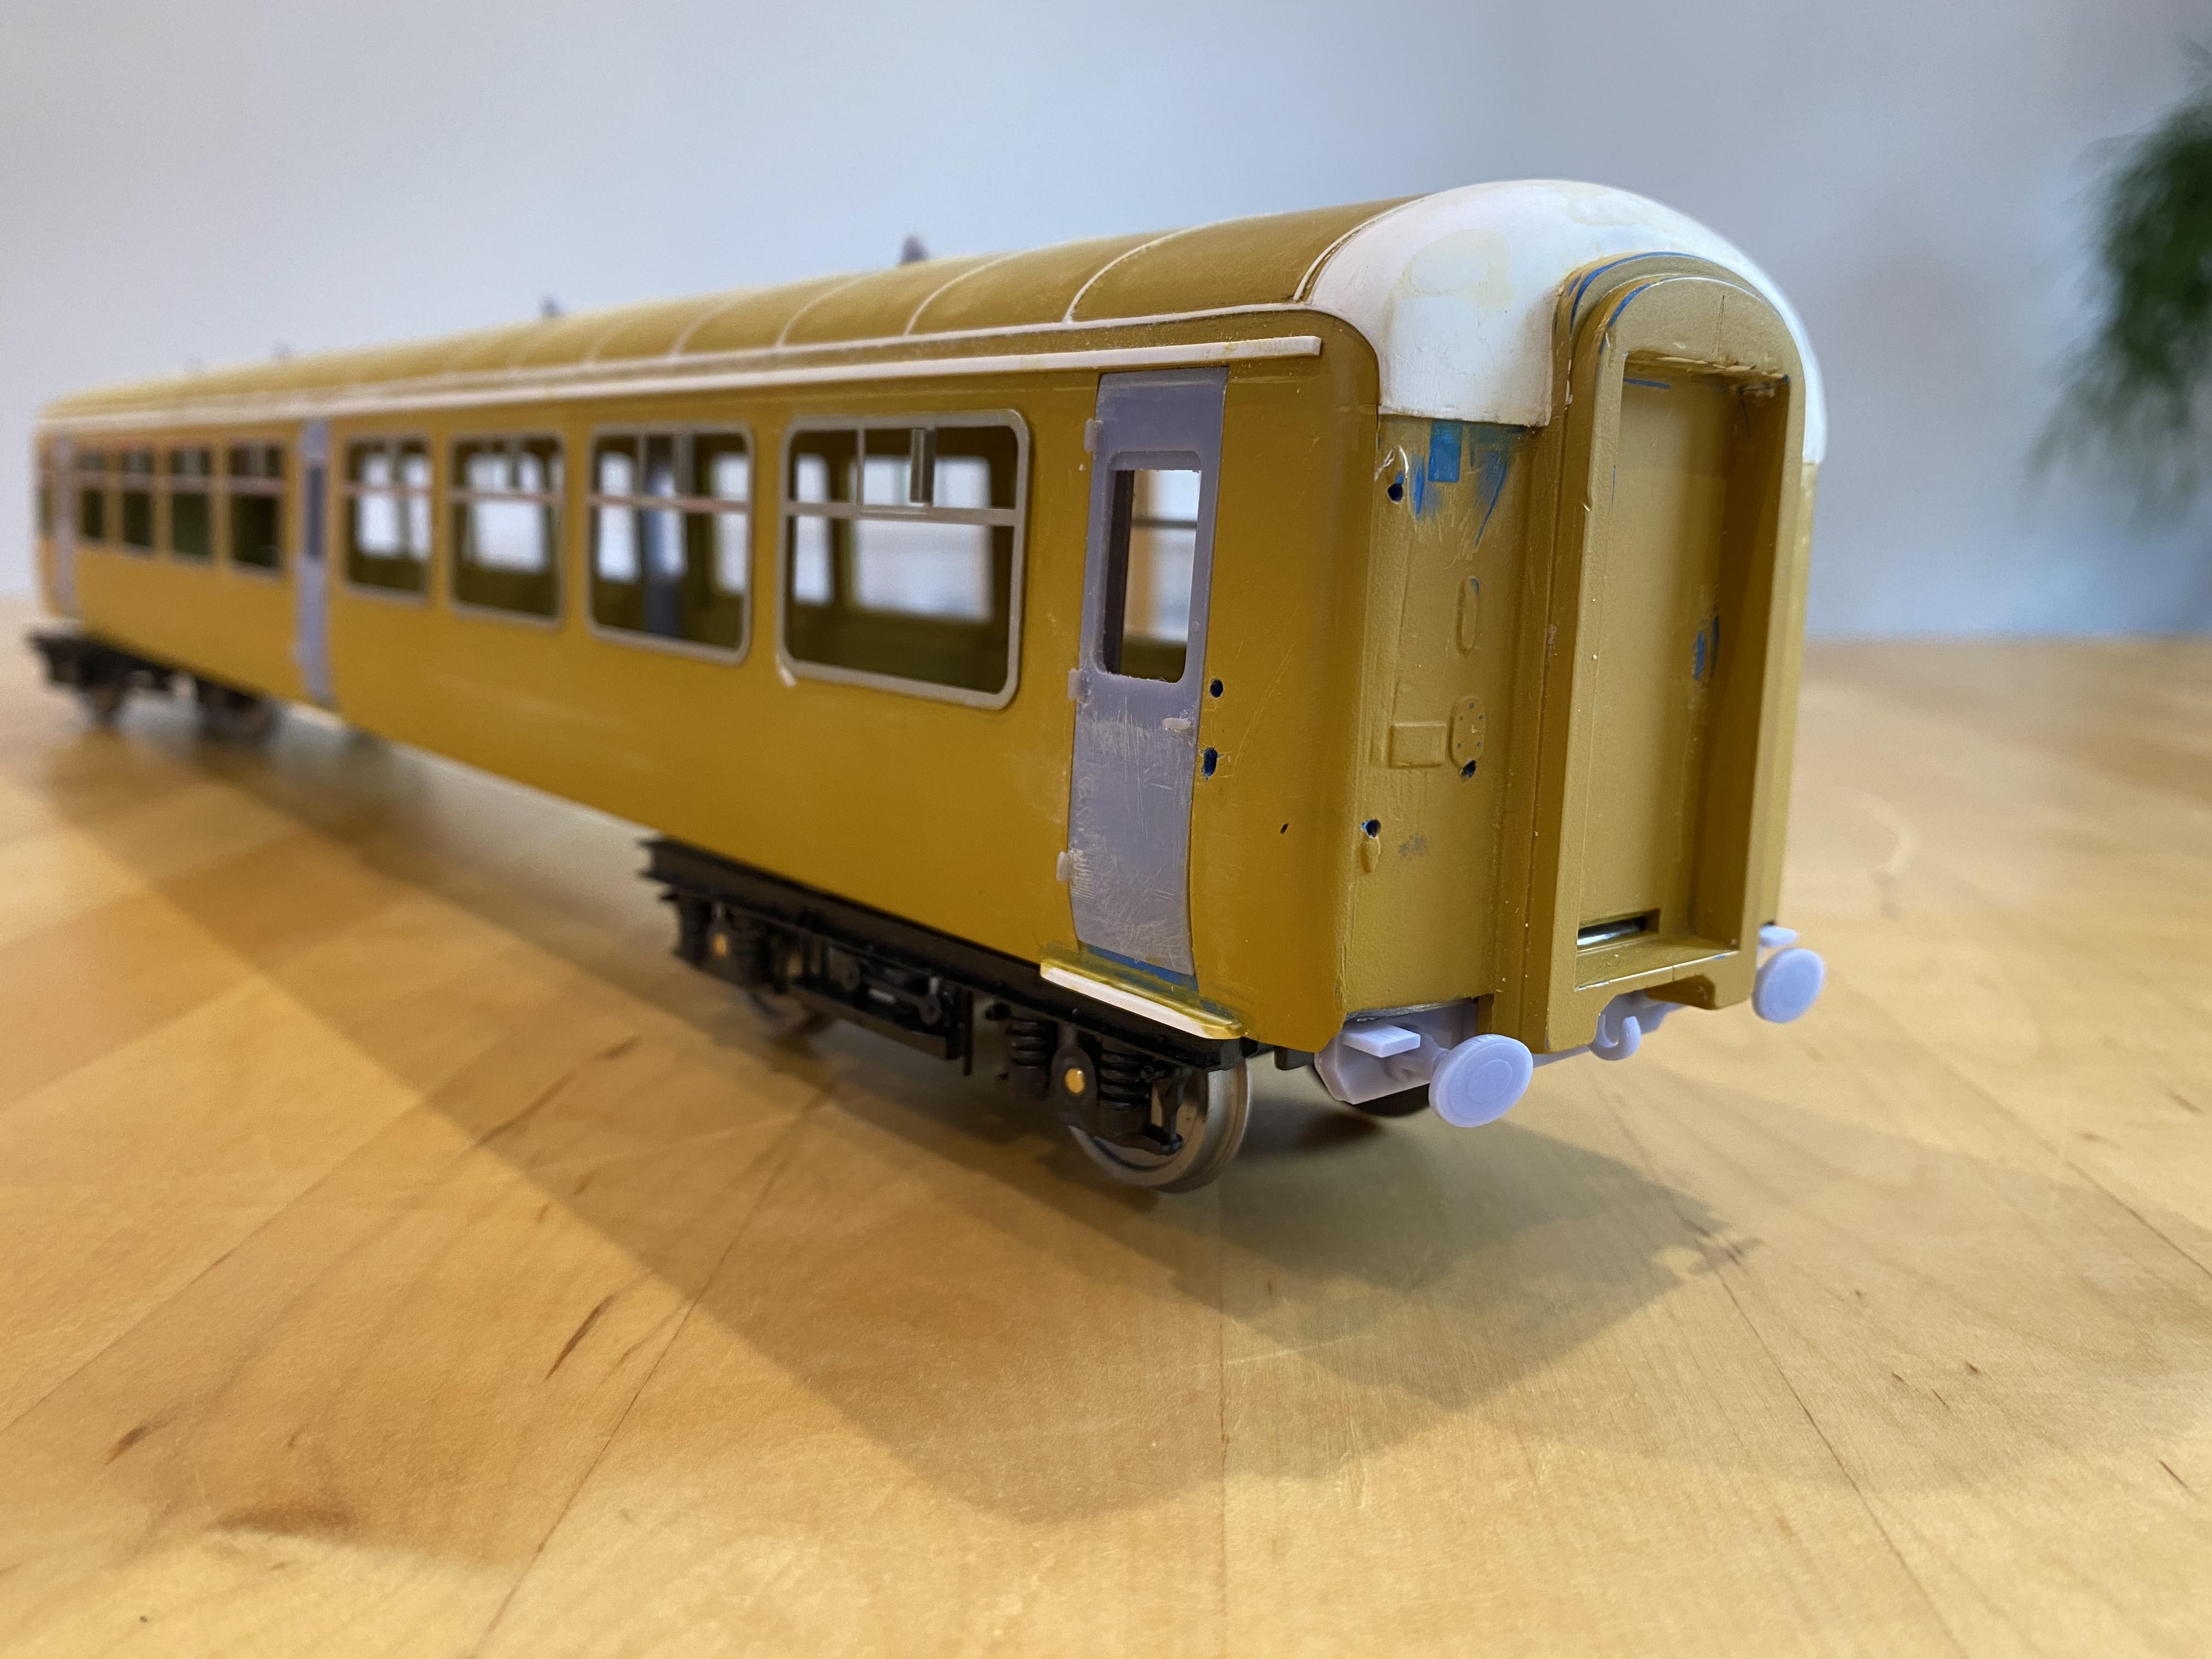
For the top coat I used Railmatch paint (Stock photo)
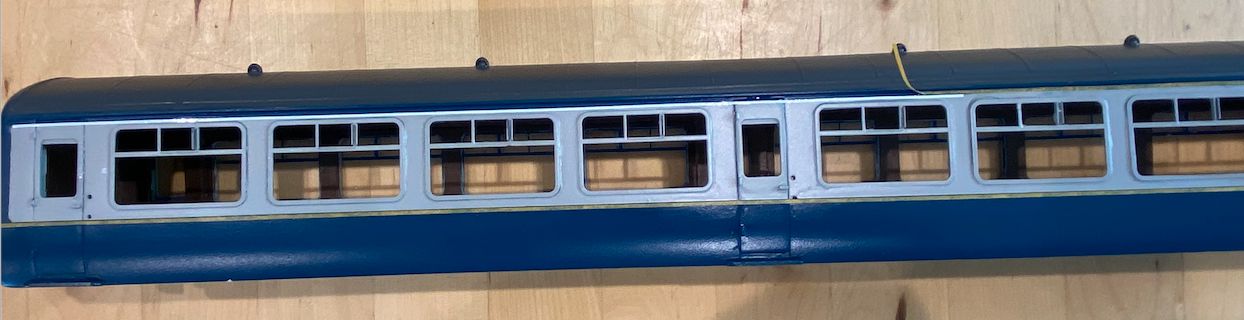
First spraying the body overall with Rail Blue then after leaving to dry for a few days masking off and spraying Rail Grey for the off white stripe along the windows.
I first sprayed the roof in Diesel roof grey which is what is recommended, but it looked way too light, so went in to a model shop and just eyed up what looked about right which I think was GWR freight grey. In reality most coaches end up having slightly different coloured roofs.
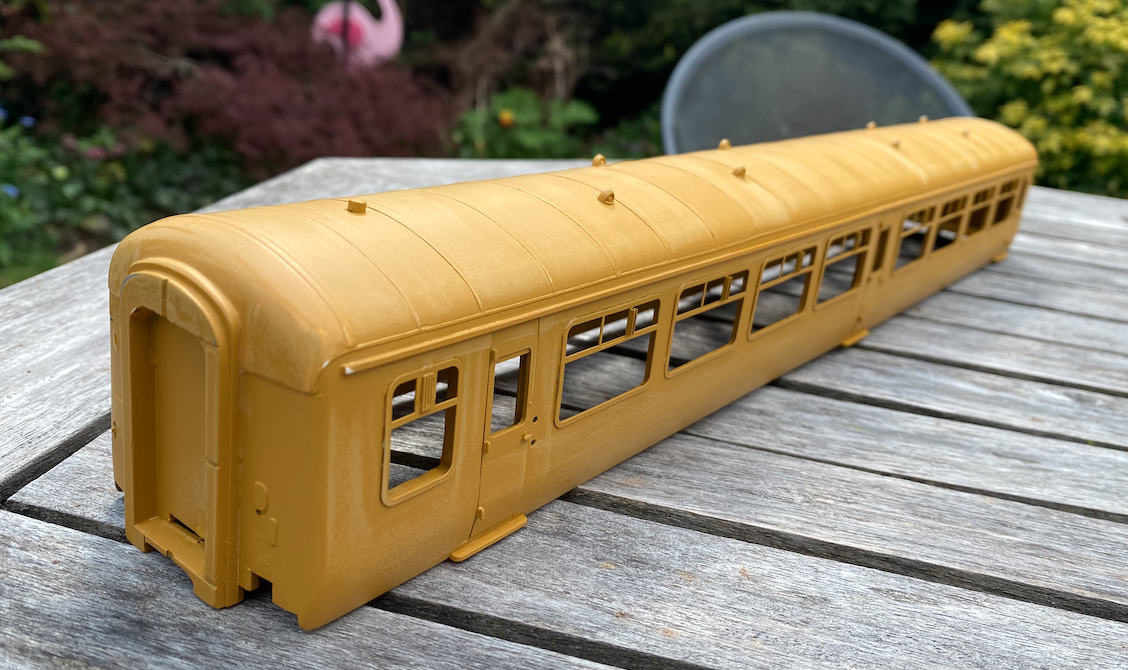
ParticipantPainting…
Looks like I didn’t take many pictures here -oops!
Here’s one after final priming and sanding.
 Participant
Here’s an image of it so far after having been sprayed matt black, unfortunately that means it doesn’t make it show up too well in photos.
I still need to fit some Kadee couplings to both ends, come up with a way to how the body to the base other than gravity – probably magnets attach some seats and walls for a coach interior and perhaps add some brake rods and pipes.
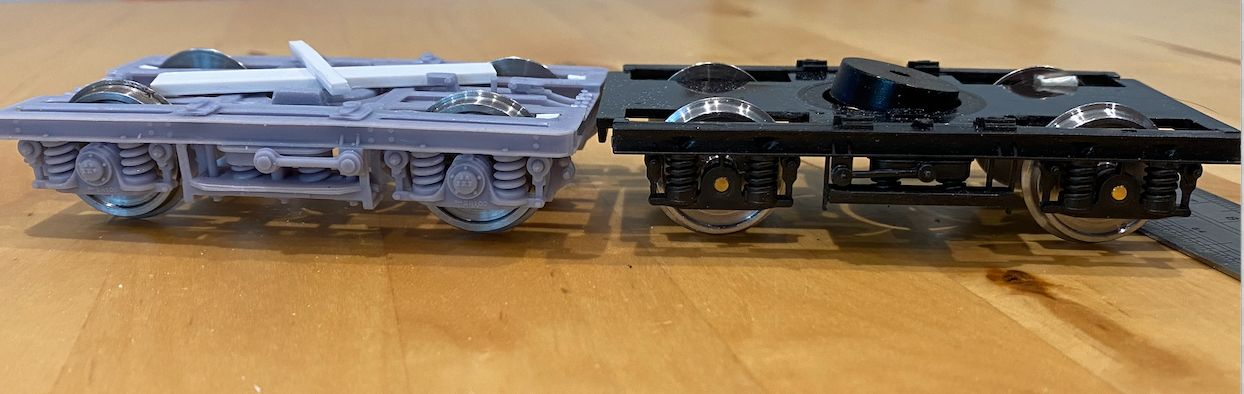
ParticipantI have a choice of bogies.
The ones that come with the original coach are OK, but not overly detailed, and would need the axles replacing anyway.
I have a set of B4 bogies from easybuild
http://www.easybuildcoaches.co.uk/TOP/BOGIE%20KITS.htm
and a set from Floyd Kraemer.
The black easy build bogies are definitely as the name suggests easier to build. (the bearing caps aren’t glued on in these photos)
Floyd’s grey 3d printed ones are I would say more detailed, having brake pads and more underside detail. The axles are actually easy build ones which can be purchased separately.
Easybuild do say they didn’t bother with the brake pads as you will be hard pressed to see them once the coach is on the track.
I have found the 3d printed parts to be more fragile, and you may be able to see a slight bowing to the frame which I think happens as it cools/sets. The couple of nits of plasticard are rested on the top as spacers to bring that bogie up to the correct height.
 Participant
The underbody furniture again came from Floyd Kraemer on eBay.
I first mounted them in a similar way he has done in this picture to a piece of plasticard. I did this as the aluminium floor had to be at the right height for the buffer beams to be attached and also give the correct ride height. The plasticard sheet then spaces the centre section low enough for the underbody equipment to be at the right height.
 Participant
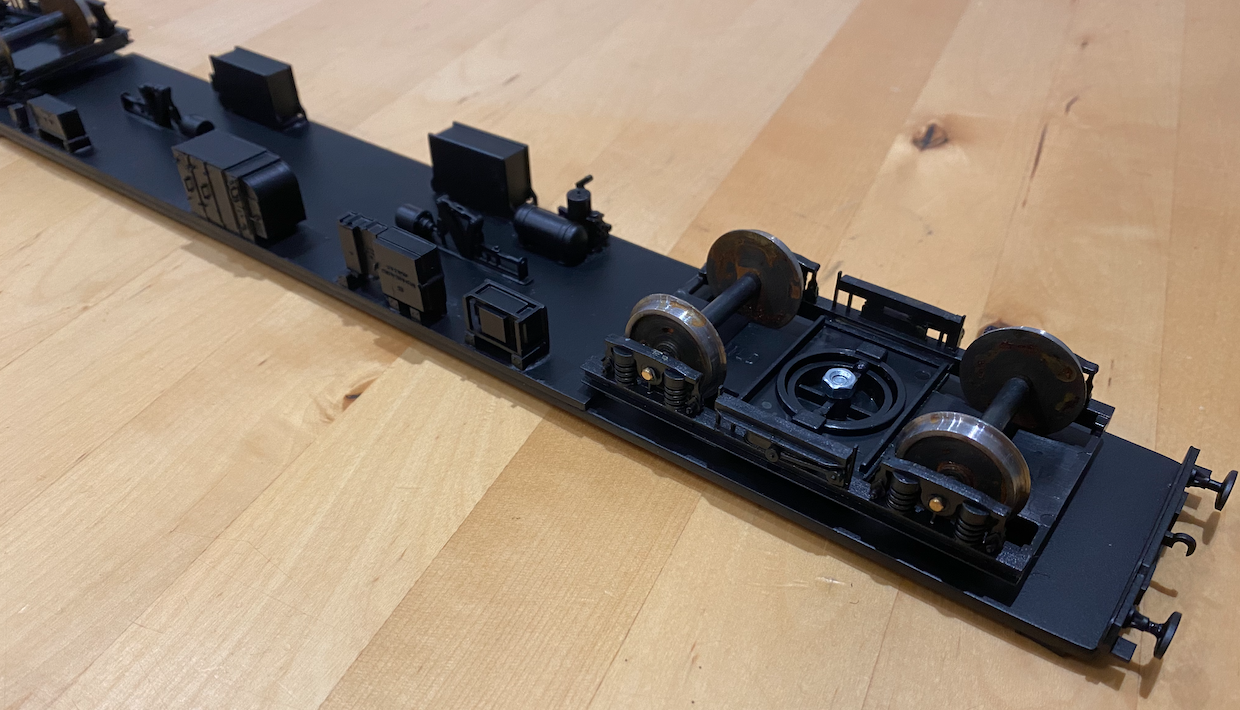
And so to the chassis…
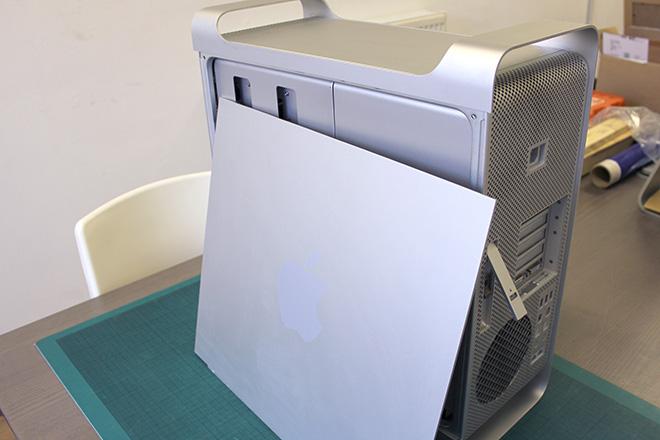
The floor of the coach is made from a 3mm piece of aluminium that actually started life as the side door of an Apple G5 computer using band saw and a bench sander. (example picture taken from the Internet)
 Participant
Having looked at some more images it looks like the ends of the roof look to be moulded fibreglass or something similar. You’d be surprised how few pictures there are of roofs of coaches although this site was a good source.
https://paulbartlett.zenfolio.com/mark2coach
More filler was used to create the raised roof ends which were then sanded back, which seemed to take forever.
I also glued in the doors, roof vents and buffer beams that came from Floyd Kraemer on eBay. The roof vents were fitted by first marking out using a combination of the original layout on the Big Big Train coaches and images of ready to run 00 gauge coaches.
Some plasticard steps below the doors were also glued on.
I’ll cover the making of the chassis it’s sitting on shortly.

 Participant
I forgot to say that with the weld lined for the roof panels it was quite variable as to how prominent they were. Apparently they got better at welding them over time and on later coaches they are much less prominent. because of this and how thick even the smallest plasticard is several other modellers doing this haven’t put the weld lines on. As I’m doing an earlier MK2a coach they would have been more prominent so I’ve put them on anyway, but then sanded the plasticard strips back to almost nothing to reduce their prominence.
ParticipantNext came the windows.
The steel rule came in handy again for getting them straight.
Stuck them on with superglue which with so little overlap on the edges was a nit of a nightmare with them repeatedly falling off which eventually improved after a few layers of top coat paint to help hold them on (Yes I have now got as far as some paint) They should stay attached even better once the glazing is glued in as well.
 Participant
After the rain gutters were fitted and after checking some fuzzy pictures on the Internet and of some 00 gauge models marked out where the roof panel weld joins should be. They seem to have ben at each window pillar and then half way along each window. This was made from the smallest section plasticard strip I could find.


 Participant
Right the an update I haven’t already done before then.
Glued on some rain gutters made from square section plasticard by using a steel rule as a guide to get it on straight.
 Participant
Hmm think I have got confused in my postings previously and posted that last update before. Actually theres’s white a few replicated updates for some reason.
ParticipantRight then… it’s been a while so here goes!
Sprayed with filler primer and sanded a few times.


-
AuthorPosts